The admin panel has two sections for managing accounts: "Account List" and "Employee List." The former is used to configure access rights and visibility, while the latter displays employee profile data and skill assessments.
What is the difference between an "Employee" and an "Account":
An employee is information about a person working in an organization: their full name, email, phone number, position, as well as their affiliation in the “Staff units” and “Organizational affiliation” sections.
An account is a record used to log in to a system. It may contain user information such as name, email address, and password.
Accounts and employees are related objects. They are almost always created and appear together. However, they can exist independently. When an account is imported, an employee is created along with it.
Contains basic information about users in the system.
Accounts are user accounts.
You can add, edit, archive , and filter accounts.
There are several ways to create accounts:
This method can be used to create administrators for technical tasks (not for assigning IDPs to them)
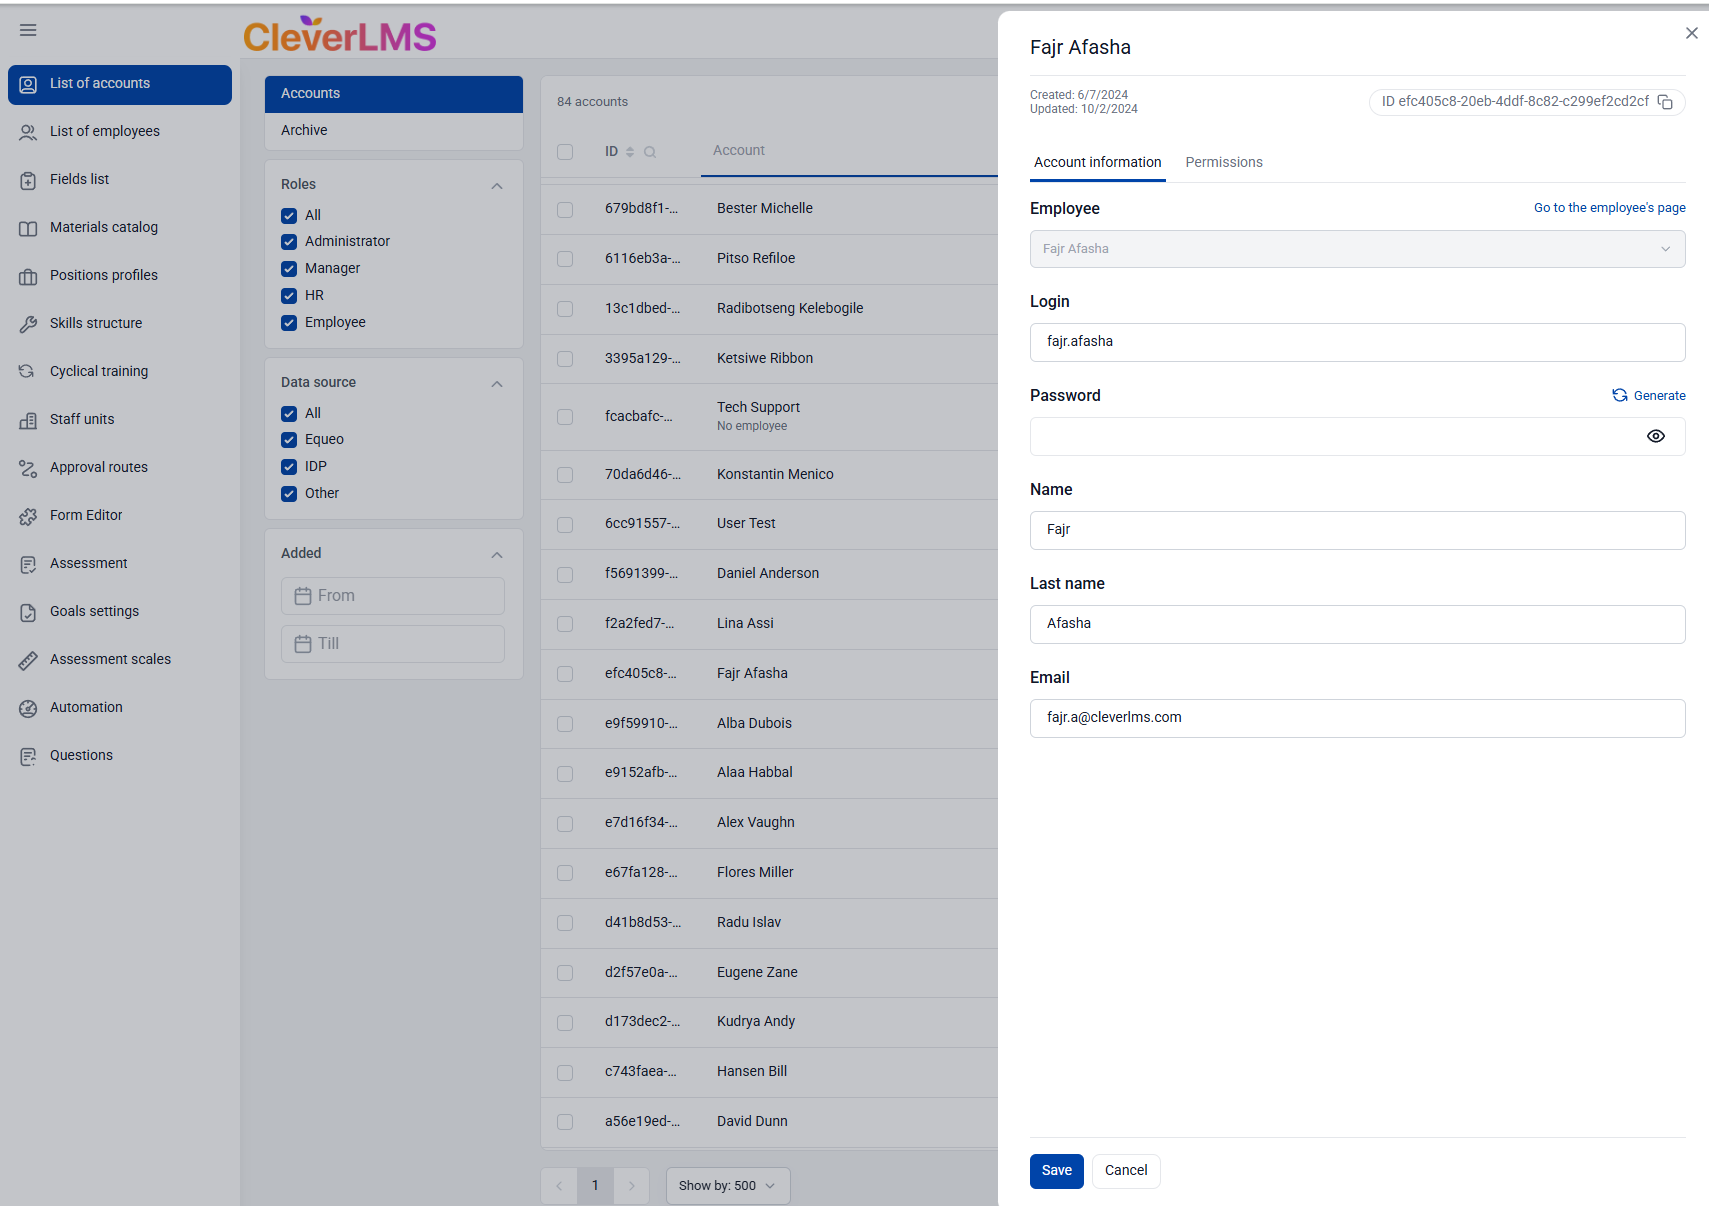
When you click "Add Account," an additional window with two tabs opens:
Account Details Tab:
Required fields are marked with an *
To create a new account, you need to check the box in the field " Create a new employee " => Fill in the fields " Login ", "Password" (you can generate a unique password by clicking the "Generate" button) > First name, Last name, Email .

The "Permissions" tab

The " Role " drop-down list is used to control access to objects.
There are four main roles: Administrator, HR, Manager, and Employee.
If you need to create an additional role, please contact Support.
Important: Depending on a user's role, access to options may vary.
If an option is unavailable, it is not enabled for that user's role.
Support can configure the visibility of an option for the entire role upon request from the administrator.
The screen below is an example of how Support can customize access to any option for any role:

Possible permissions for roles:
- Goal Creation – Determines whether goals can be added to your own and your employee development plans.
If the setting is disabled, the "New Goal" and "Add Goal" buttons are not displayed in the development plan, employee profile, and bulk actions window.
- Editing a goal allows you to change goals in your own and employee development plans: change the status of a goal and materials, and specify the percentage of completion.
If the setting is disabled, the Edit button is not displayed when viewing a goal in the development plan and employee profile.
- Delete a goal – allows you to delete goals in your own and in your employees’ development plans.
If the setting is disabled, the Delete button is not displayed when viewing a goal in the development plan and employee profile.
- Creating an IDP – allows you to create an IDP in your development plan and for your employees.
If the setting is disabled, the "Open IDP" button is not displayed in the development plan and employee profile, and the "New IDP" button is not displayed in the mass actions window.
- Deleting an IDP – allows you to delete an IDP in your own and in employee development plans.
If the setting is disabled, the "Delete IDP" button is not displayed on the "Employees" and "Employee Profile" pages.
- Editing a route during the approval process – allows you to change the route during the approval process.
If the setting is disabled, the Edit button is not displayed in the approval window.
- Access to the admin panel.
If not set, access to the admin panel page is denied. - Report generation – allows you to create reports.
If this setting is disabled, the "Generate Report" button won't appear in the admin panel or employee profile, and the "Report" button won't appear in the bulk actions window. This setting also controls access to the Analytics section .
- Leave comments – Allows you to leave comments on the goal.
If this setting is disabled, the "Write a comment" field will not appear when viewing the goal. - Initiating the IDP Summarization Process – allows you to initiate the summarization process.
If this setting is disabled, the "Initiate Summarization" (in the employee list) and "Add Assessment" (in the employee profile and IDP) buttons are unavailable. - Deleting Summarization Results – allows you to delete all data related to the summarization process or the assessment of goals for a given IDP.
In the View Employees block:
- All – the user sees all employees in the system.
- Only my own – the user sees only those employees who are assigned to him in the admin panel.
- Nobody – the user does not have access to the "Employees" page (it is hidden in the menu and is not accessible via a direct link) and cannot open employee profiles.
In the Editing results of summarizing block:
- All – You can edit ratings for any user, as well as add and remove raters from employee profiles within your visibility scope.
- Only your own – you can edit only your own ratings, as well as add and remove raters.
- Nobody – editing ratings and managing raters is not available.
If you would like to edit permissions for any role in the system, please contact support.
If we log into the IDP admin panel as an administrator and change our account's role to another, we will no longer see the admin panel until another administrator returns the administrator role to that account.
The " Managers " drop-down list includes the user's immediate, functional, project, and mentor managers. There may be multiple managers. Subordinates will be visible in the "Employees" tab.
After adding managers, the selection can be adjusted.
The " Employee Visibility Settings " block allows access to other employees' plans. Managers can monitor not only their own team's plans, but also those of users assigned to them.
Employee visibility can be defined by user groups within the organizational structure. Groups can be selected from the drop-down list by clicking " Select Department ." You can also select individual visible users using the " Employees
" drop-down list .
It's important to note that the " Managers " and " Employee Visibility Settings " settings are an addition to the existing reporting structure. They can be used to expand the information display options for selected users, if necessary.
The main way to create an account and employee
To enable integration, please contact your support manager.
Data transfer is typically configured during the implementation phase, but can also be configured later. If data is transferred via integration, adding, editing, and deleting occurs in the source system (where the data is pulled from), while in the IDP, data is automatically updated via the API.
This method can be used to create administrators for technical tasks (not for assigning IDPs to them)
You can download the import template, fill it out, and import the data. After importing, the accounts will appear in the account list.

The file can be used not only to register, but also to edit existing employee accounts.

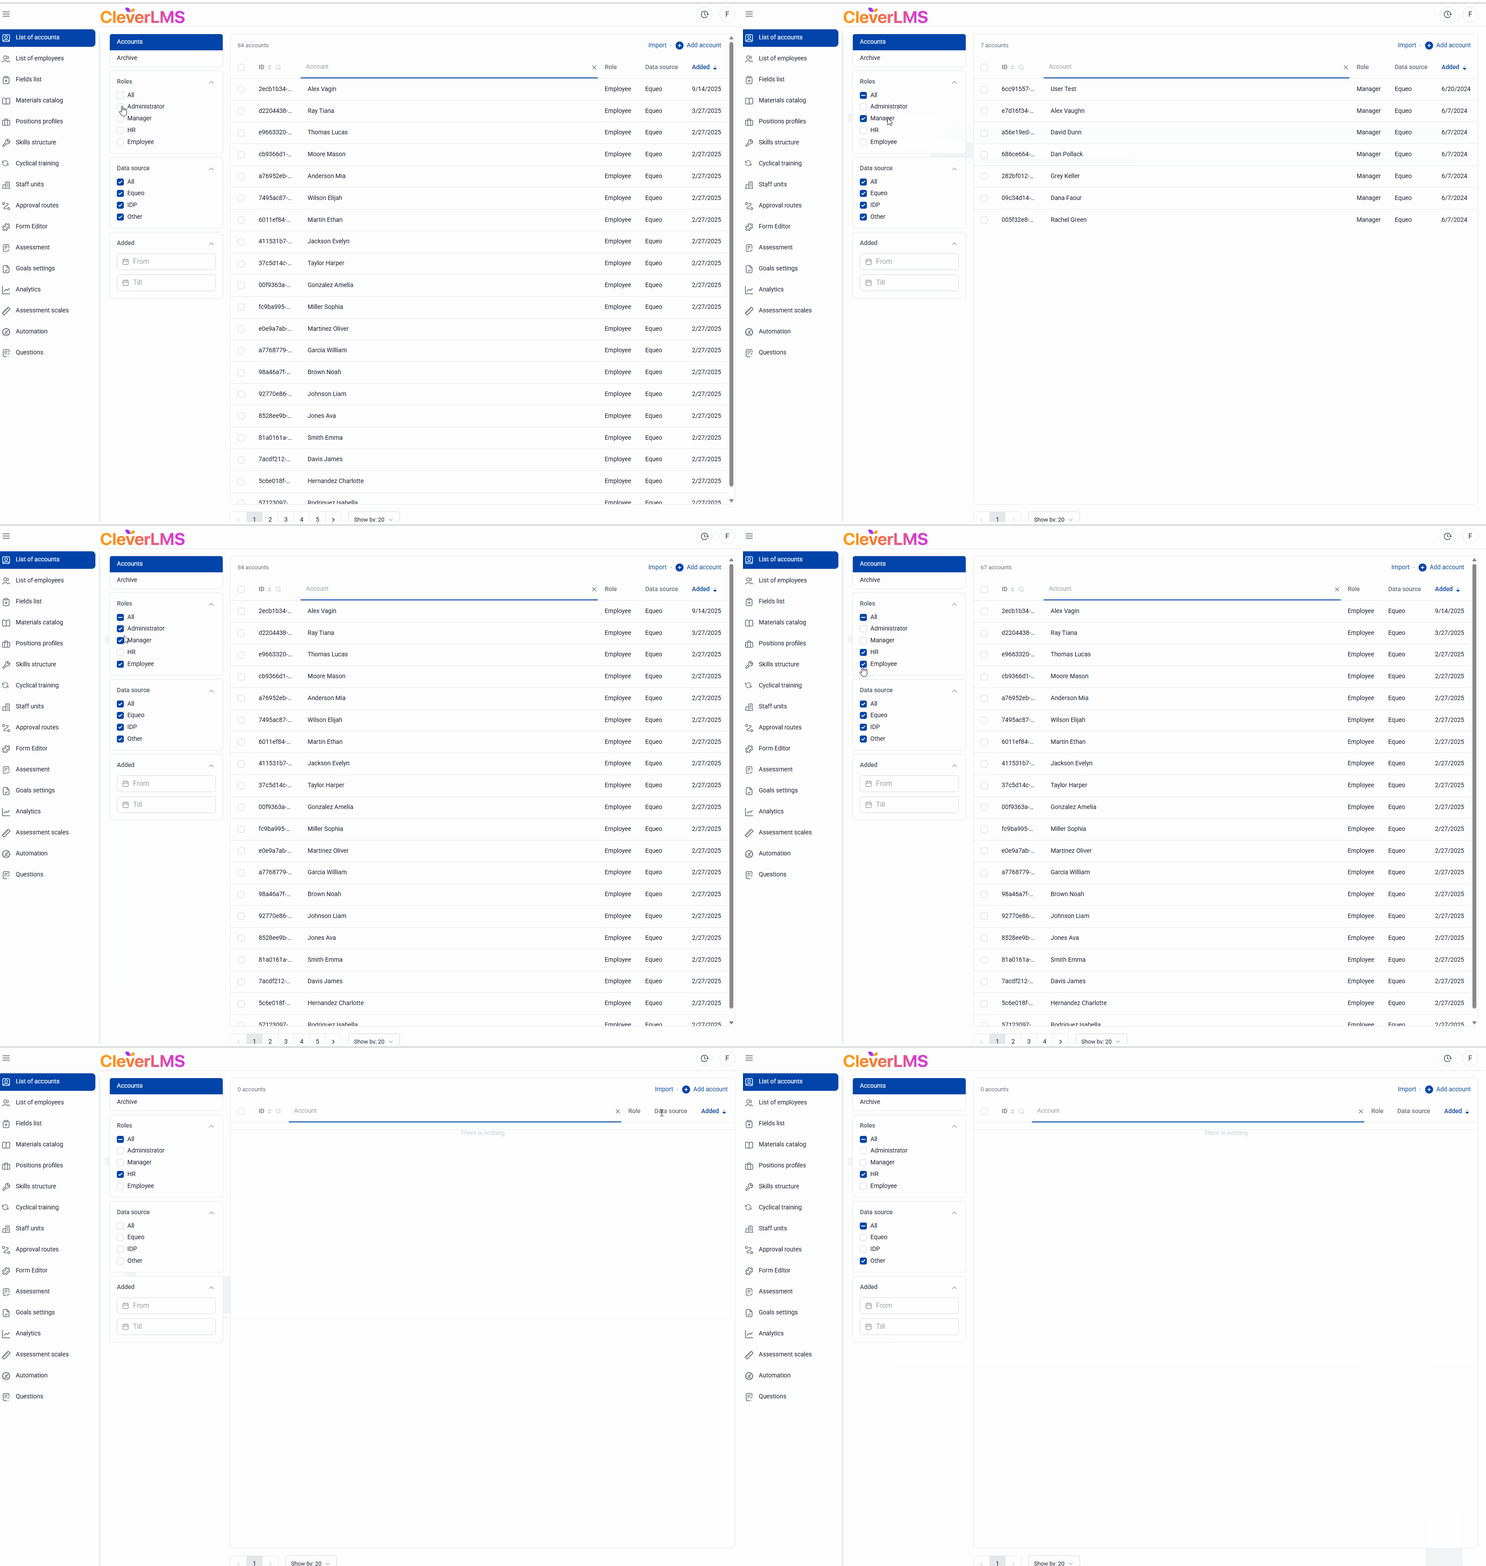
Filtering is available by:
- Roles;
- The date of adding an employee "Added" is the date of transferring the user to the IDP, and not the date of the actual creation of the employee in the source system;
- Data source - where the employee came from:
- CleverLMS- are drawn to integration from CleverLMS;
- IDP - were created directly in the IDP;
- Other - integration is configured with another system, for example, 1C, etc.
Mass actions
The administrator can perform bulk actions on selected accounts. To search for accounts in the table, you can use the filter in the additional navigation area or search by columns.
After selecting items by checking the box in the desired row, the number of selected items will appear above the table.
After selecting rows, the "Actions" menu appears above the list : Archive – archives accounts. They can be restored later, if necessary.
