An import file can be used to load a large number of structure groups onto the platform.
This feature is often used when launching a new company on the platform.
To load groups using the "Import" function, you must:
1. Prepare the current structure
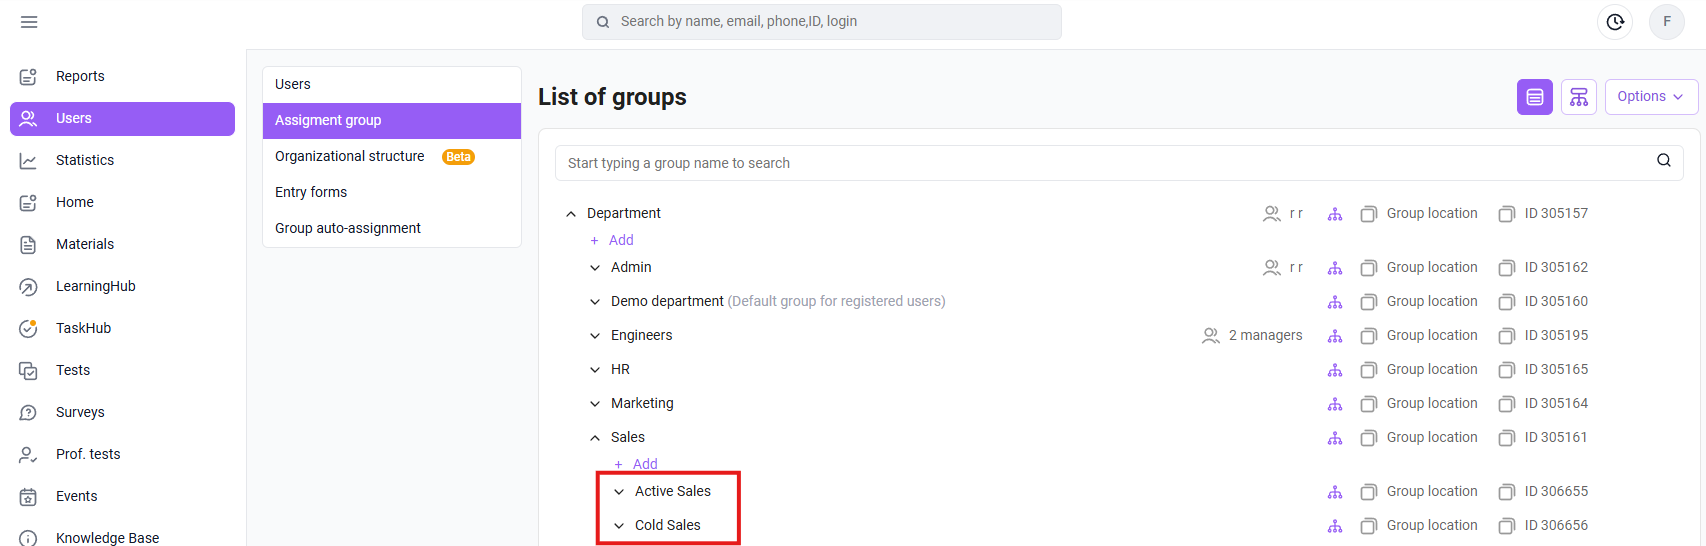
At the launch stage, root groups have already been created on the platform for example .
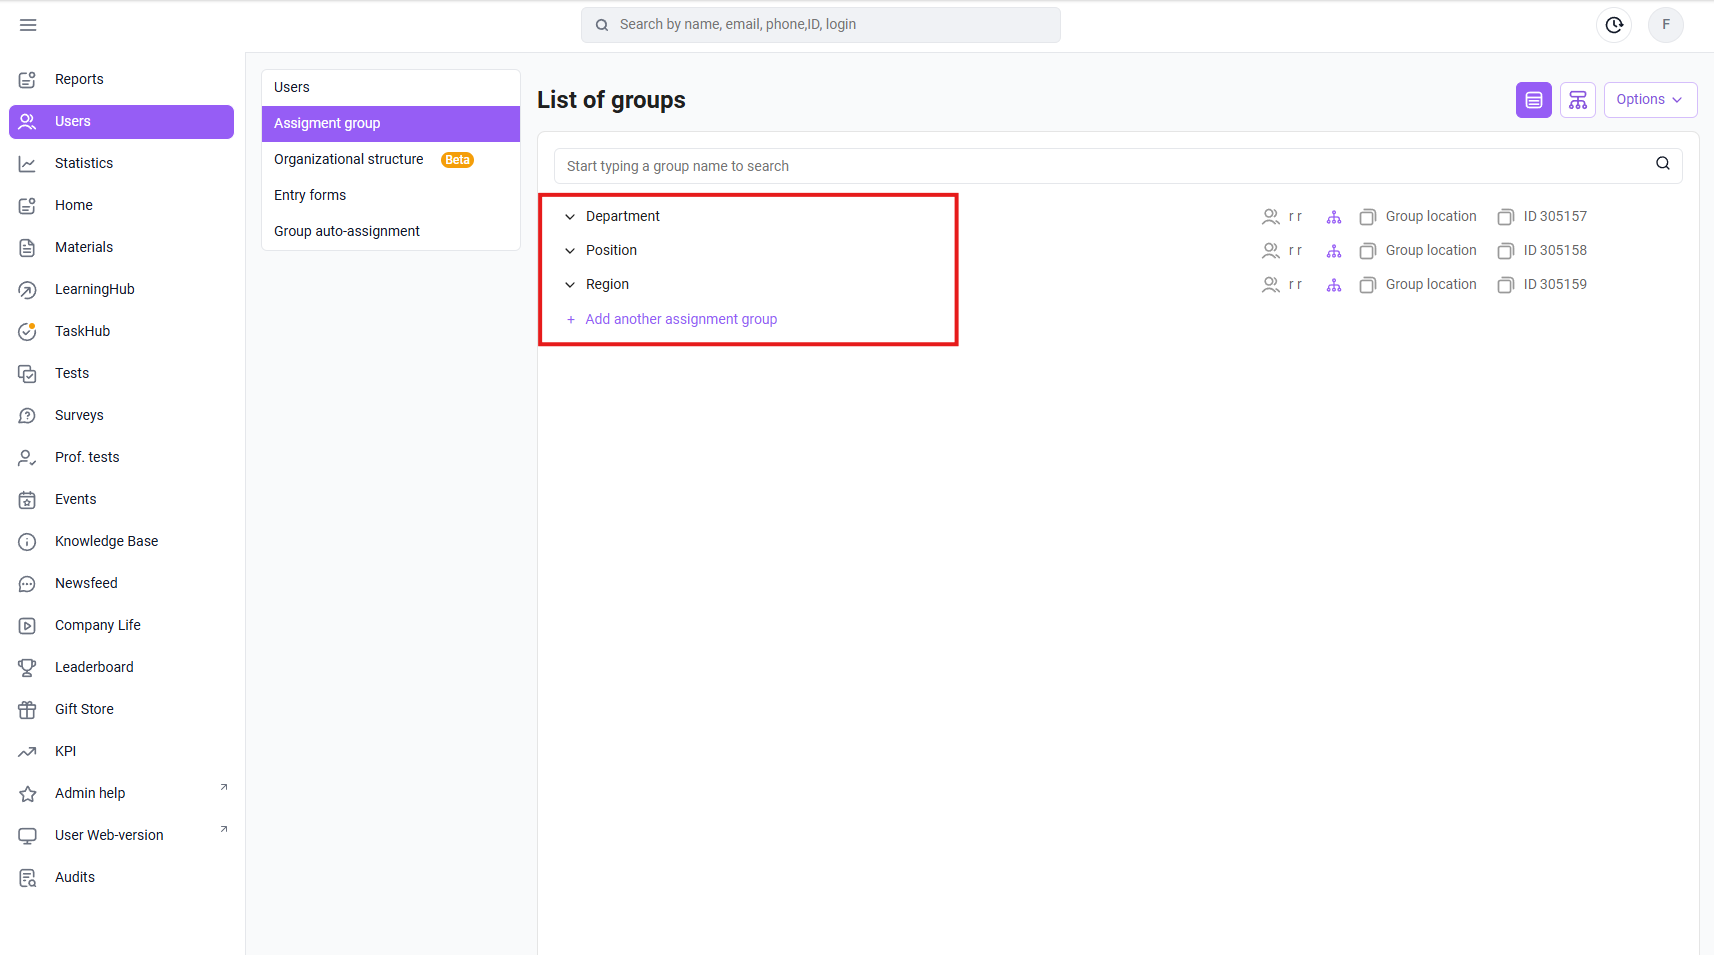
And child (nested subgroups in the root)
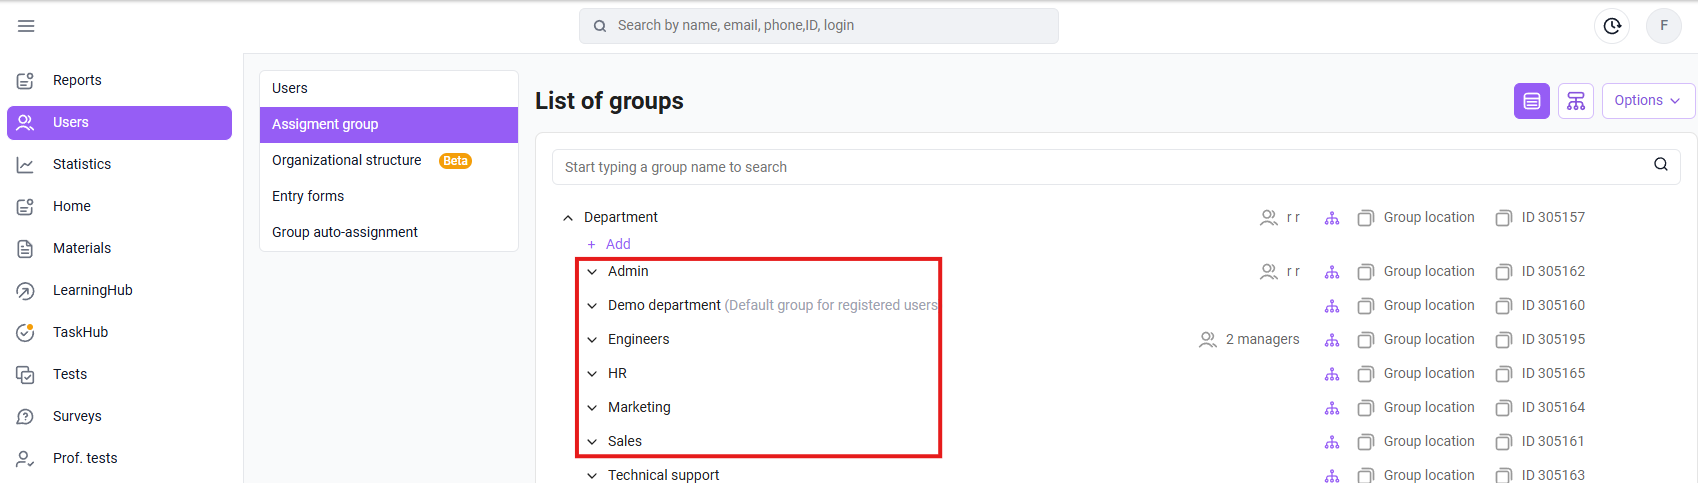
If you don't need them in your structure, you can delete unnecessary groups or rename them.
The import file can add root and child groups and rename them. Deleting groups must be done manually.
2. Download the import file from the "Destination Groups" tab in the "Users" section.
This can be done as follows:
- go to the "Users" section;
- select "Destination groups" in the additional filtering field;
- Click "Options" and select "Import".

3. Open the downloaded import template
The import file contains the following fields:
ID Group-values
This value can be copied by clicking on the id opposite the group.
Full path.
The path to groups is specified as follows: Company > Eastern Branch > Central Division.
In our example, we've defined a structure where "Company" is the root group. Within it, there's a child group called "Eastern Branch." Within that branch, there's a subgroup called "Central Division."
When specifying the full path, you must include the entire chain of parent groups, separated by the ">" symbol
. If you include only one group name in the full path, without the ">" symbol, this line will be interpreted as an existing or new root group.
If these groups are already defined in the system, you can copy the path by clicking the "Group Path" button.
Group name
The name is specified for the group that we are creating or changing.
Available for selection upon first login or registration
If you enter "1" next to a group in this column, the group will be available for selection; if you enter "0," it will be unavailable for selection.
This setting is used if self-registration is enabled for the company.
It is hidden upon first login or registration.
1. If you enter "1" next to a group in this column, the group will be hidden, but its descendants (if any) will be elevated to the same level as this group. If you enter "0," the group will be displayed.
This setting is used if self-registration is enabled in the company.
It's not necessary to fill in all three values (Group-Value ID, Full Path, and Name). You can fill in one or more of the required fields.
If more than one column is filled in, the group is identified by the value of the column with the highest priority:
ID takes precedence over the full path, and the full path takes precedence over the group name.
Group leader IDs
This column can be used to add functional managers for user groups.
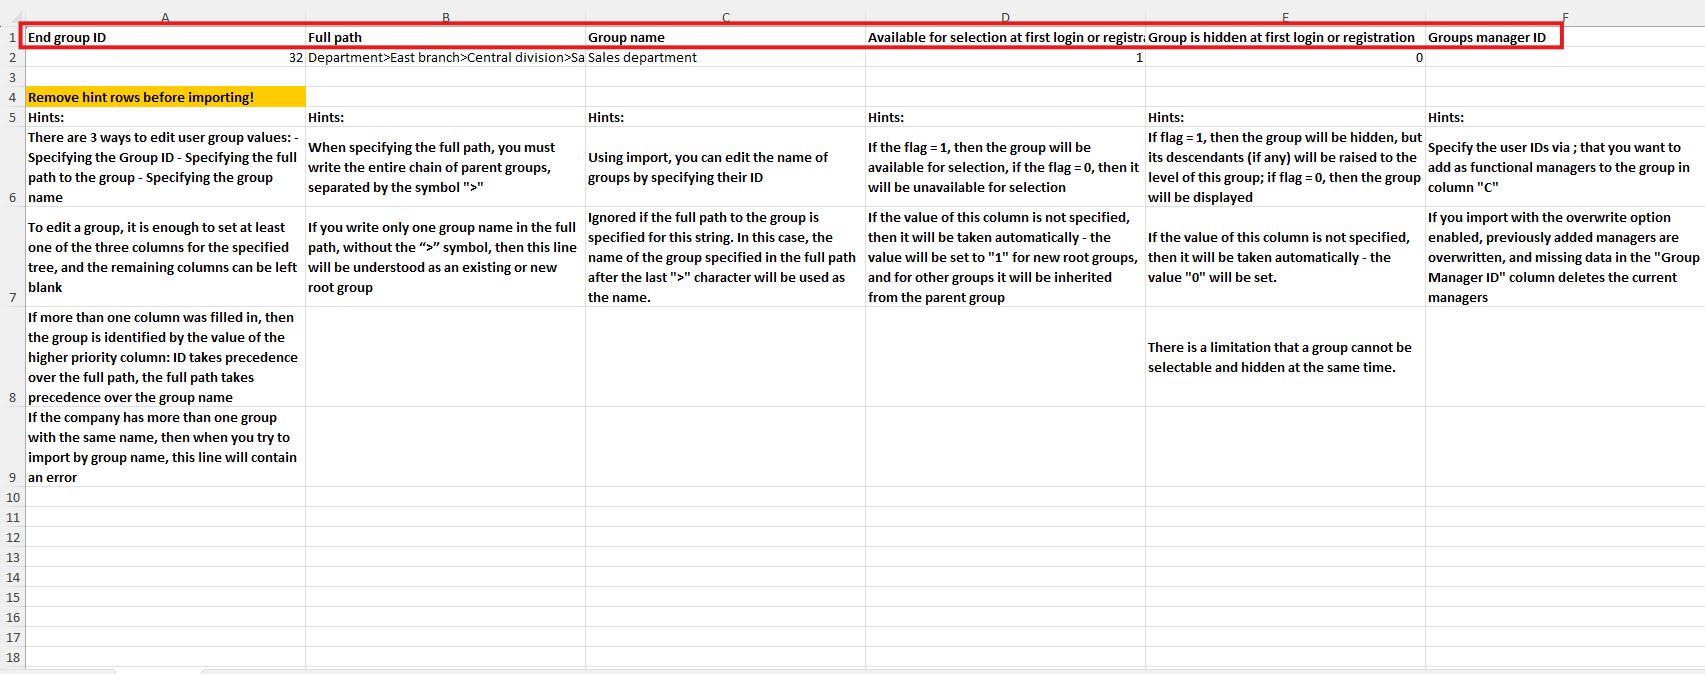
The file already contains examples and hints.
After reviewing them, they should be deleted.
4. Upload the file to the platform
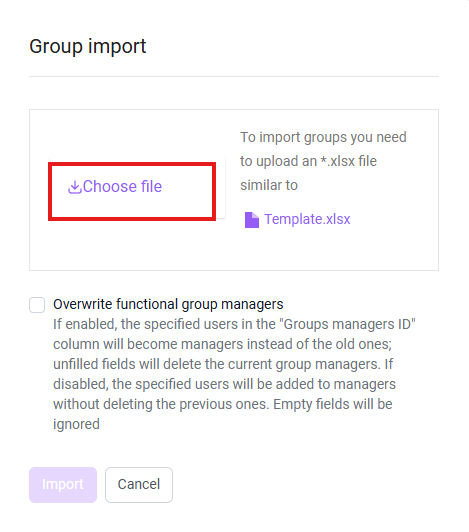
The "Overwrite functional group managers" checkbox is enabled if you want to replace or delete existing functional group managers using the import template.
For information on how to use the import function to add/edit functional managers, please refer to the article at the link.
Let's look at group loading cases
If you need to add a new root group with nested subgroups to the system.
For example: Department-Job>Active Sales>Sales Manager.
Enter the full path. Save the changes to the file and upload it to the platform.

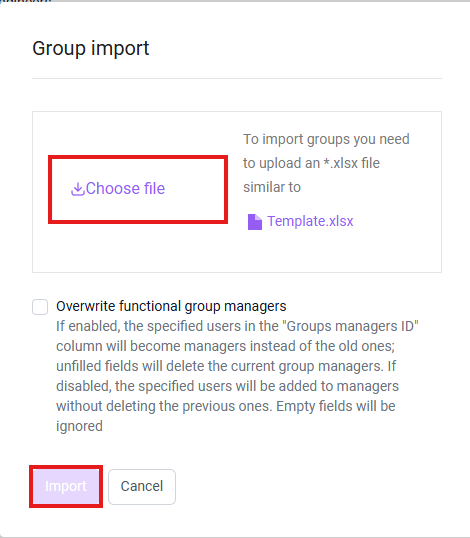
To upload, go to Settings > Options > Import > Select the prepared file > Click the import button.
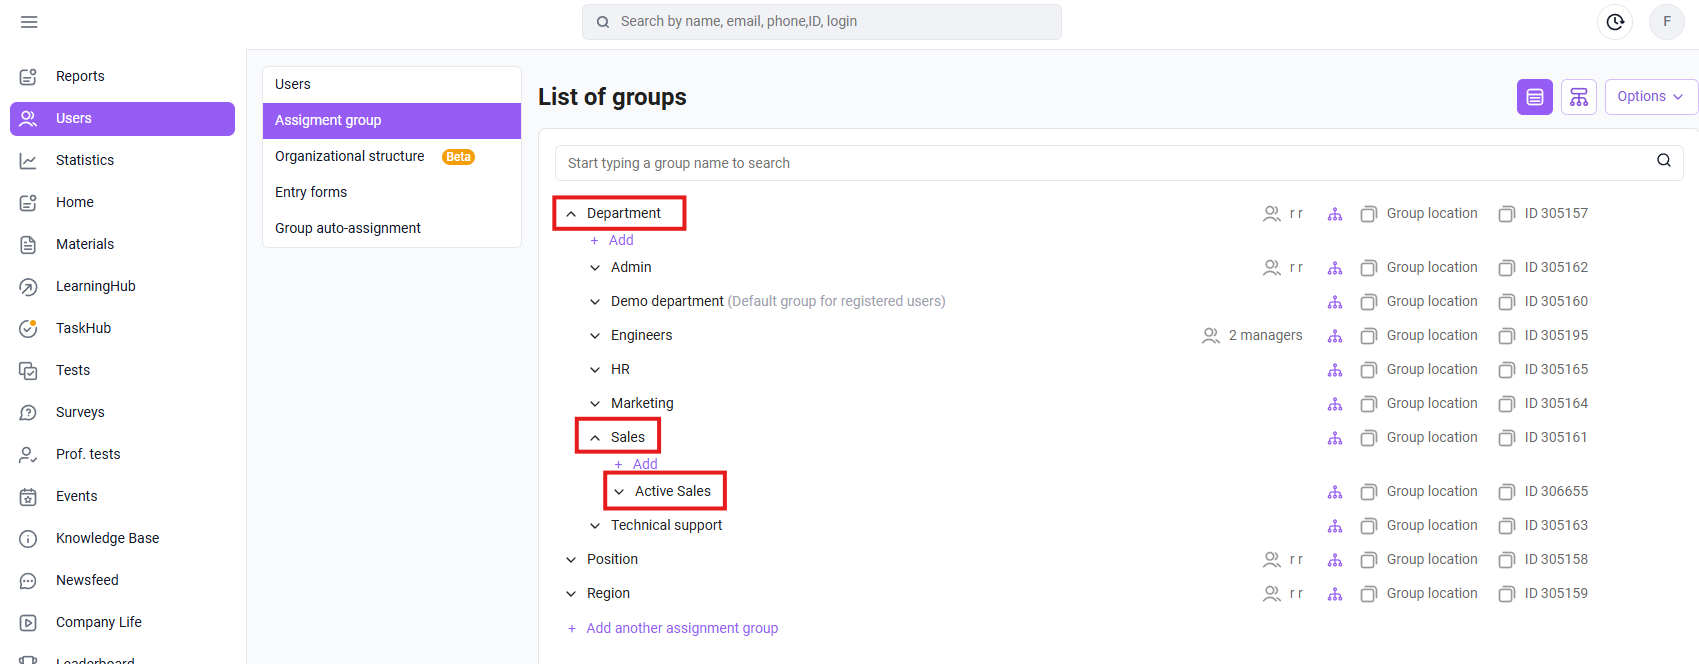
We refresh the settings page and see that new groups have appeared in the list.
If you need to add several groups at once, then we write them in the template in the same way.
We also write the full path:

We upload the file to the admin panel. We see that the new groups have appeared in the list.
If the group needs to be renamed:
You need to specify its ID (copy it to the admin panel) and enter a new name in the "Group Name" field.
This way, you can rename a large number of groups at once.
Mass assignment of functional managers using the import file in the Settings section.
Includes the following sequence of actions:
- Go to the " Users " section;
- Go to the " Destination Groups " tab;
- In the upper right corner, click " Options ";
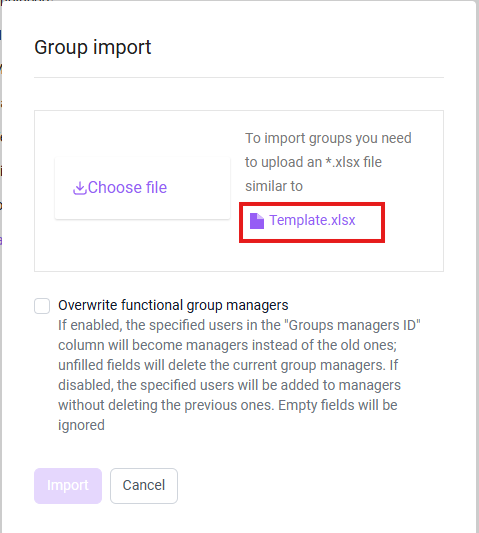
- Select " Import " and download the template " Template.xlsx " ;
- Fill it out.
In the template, specify the group name and either its ID or path. This will help avoid errors if there are any duplicate names in the system.
Separate multiple managers with a semicolon (;).
Once you have completed the template, upload the completed file as follows:
- In the upper right corner of the " Settings " section, click " Options ";
- Select " Import " and click "Choose file " ;
- If necessary, enable the " Overwrite group managers " checkbox and click " Import ".
If the "Overwrite" option is disabled , new managers are added, and old values, if any, remain unchanged. Empty cells with manager IDs in the group are ignored.
If the "Overwrite" option is enabled, new managers are recorded and old values, if any, are erased. If the column is empty, the manager data is cleared.